 Asal Ku Training
Start here › Lesson 16
Groups: who can find and see your tree
Join or create a private circle of relatives, approve people who ask to join, and choose for each of your trees whether a group can find it or view it.
In this lesson you will learn
- What a group is, and why trees are found only through groups
- How to join a group with a code, an invitation link or the directory
- How to create a group and approve the people who ask to join
- The two levels for a tree: Listed and Open, and what members see at each
- Where the trees opened to you by a group appear
What is a group?
A group is a private circle of relatives, for example "Baker Family". Only people an administrator approves can join. A tree can be found by name only by the members of a group it belongs to. Nobody outside your groups can search for your people.
Before groups, any signed-in person could find a tree that was switched on for searching. Now you decide which circle can find it.
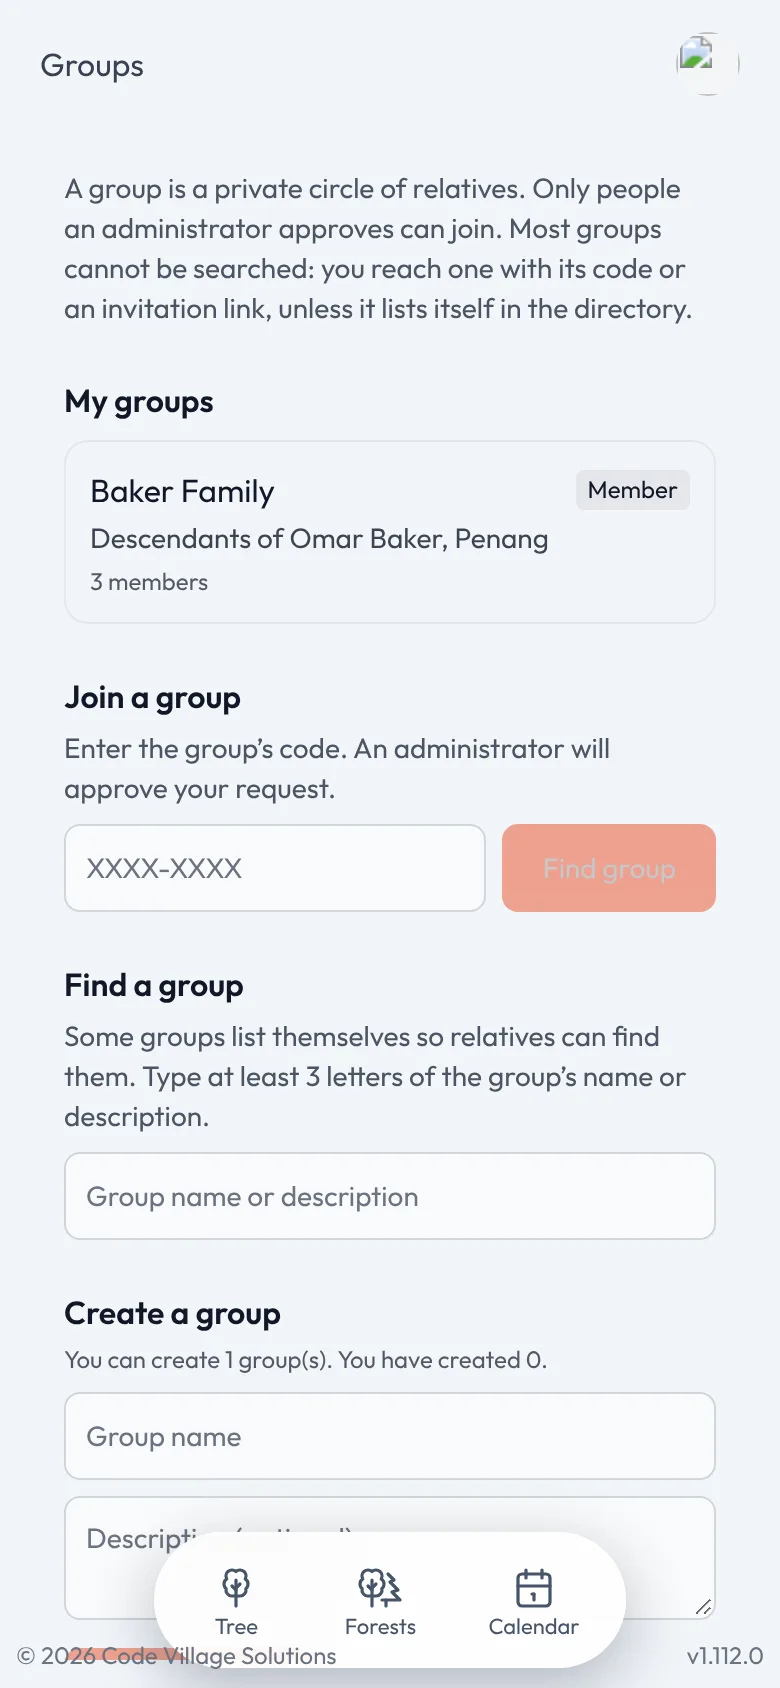
Open the account menu and tap Groups. The page lists My groups (with your role: Administrator or Member), your requests and the forms to join or create a group.
Join a group
With a code. Ask a group administrator for the group code (like AB3K-7XYZ), type it under Join a group and tap Find group.
Write who you are, for example Aisha, Omar's granddaughter, and tap Send request. The administrators see your name, your email address and this message.
The request shows Waiting for approval until an administrator answers. You can cancel it. If it is declined you can ask again after 7 days.
With an invitation link. An administrator sends you a link by message or chat (the app never emails it). Open it while signed in and you join at once. If the link was made for one email address it only works for that address.
From the directory. Some groups list themselves. Under Find a group type at least 3 letters of the name or description and tap Ask to join. You still need approval.
Create a group and approve requests
On the Groups page fill in Create a group: a name and, if you like, a description. Tap Create group. You are its first administrator.
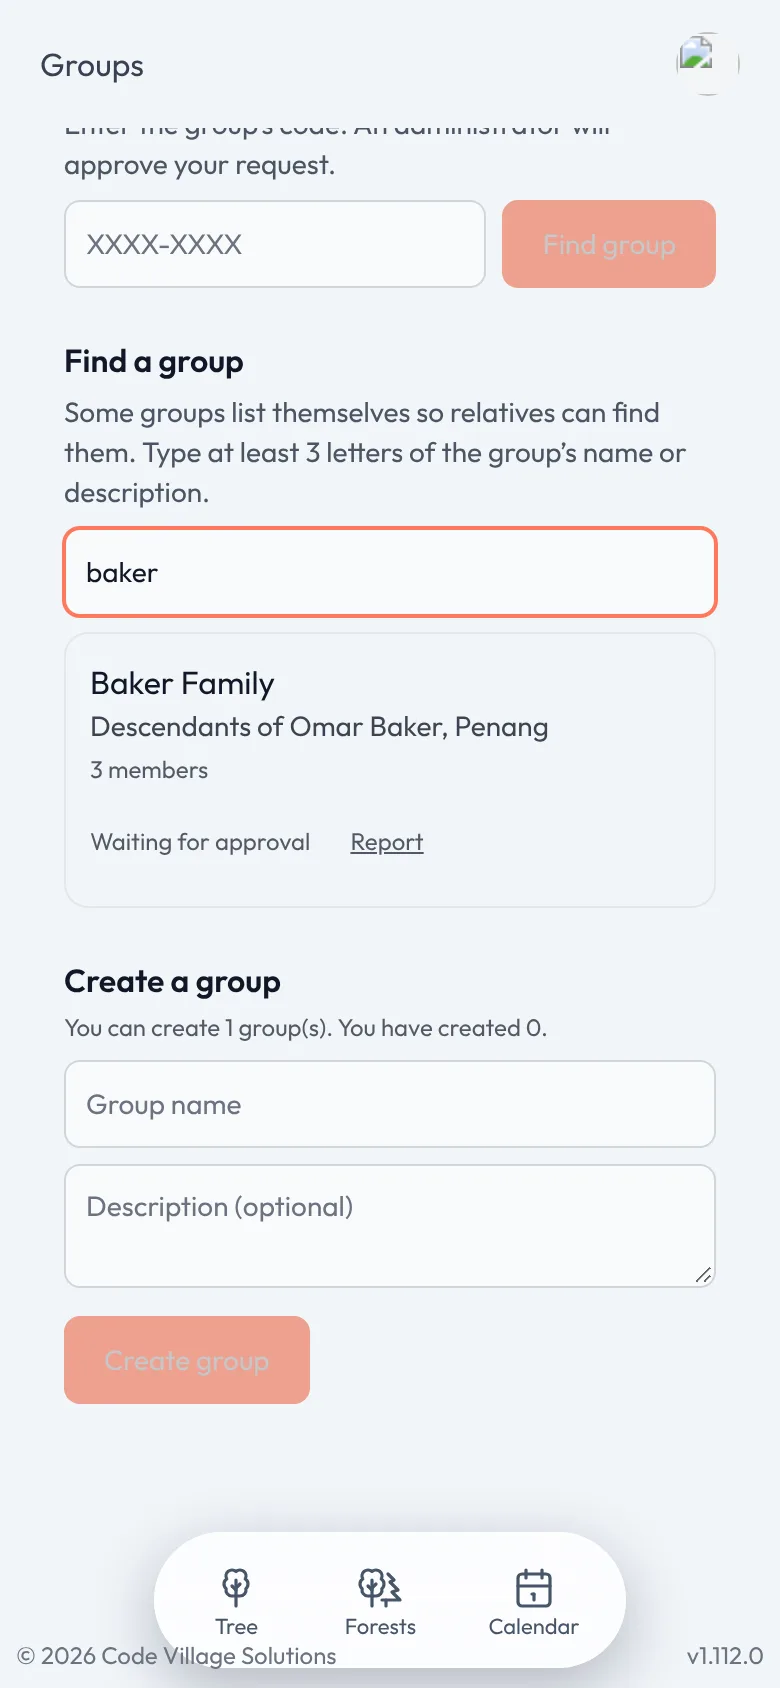
The page of your group has tabs: Requests, Members, Invitations, Trees, Settings. When someone asks to join, a number appears on Groups in the account menu, and (if you left Email me when someone asks to join on) an email arrives.
Under Requests read the name, email and message. Tap Approve, or Decline (you may give a reason the person sees), or Block.
- Invitations: create a link, choose how many times it can be used, how long it is valid, and optionally the one email address it is for. The link is shown only once: copy it and send it yourself.
- Settings: change the name and description (and give them in other languages), choose By request or Only by invitation, make a new code (the old one stops at once), and optionally List this group in the group directory. A listed group can be found by anyone signed in, who can see only its name, description and number of members.
- Members: make someone an administrator or remove them. A group always keeps at least one administrator.
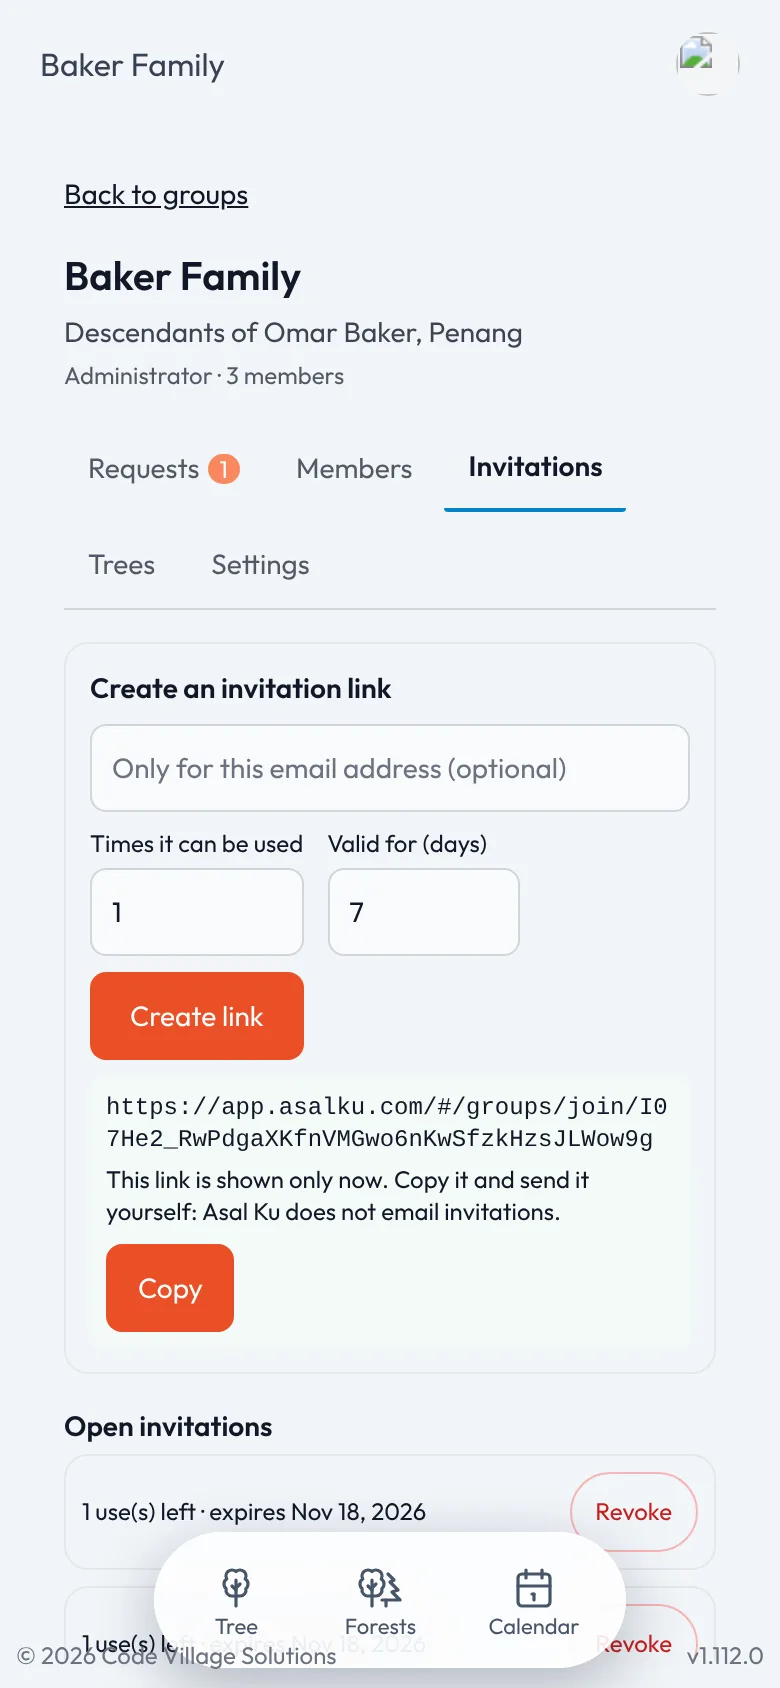
Each account can create a limited number of groups (one, to begin with); the page tells you how many. This stops people from reserving names.
Choose what a group can do with your tree
Open your tree, tap the share icon and then Groups that can see this tree…. For each of your groups choose one of three:
| Level | What members can do |
|---|---|
| Not in this group | Nothing: the group cannot find or see the tree. |
| Listed | Members can find your people by name and ask to connect (lesson 10). You approve every connection. They cannot open the tree. |
| Open | Members can view the tree, read-only, but only the parts you tick. |
For Open a list What members of this group see appears. Tick only what you are happy to show: for example Photo, Full name, Birth and death dates, Tree name, the Gallery, or any group of details. The cautious choice is already ticked for you; everything else stays hidden. A name you do not tick as "Full name" shows only its first word.
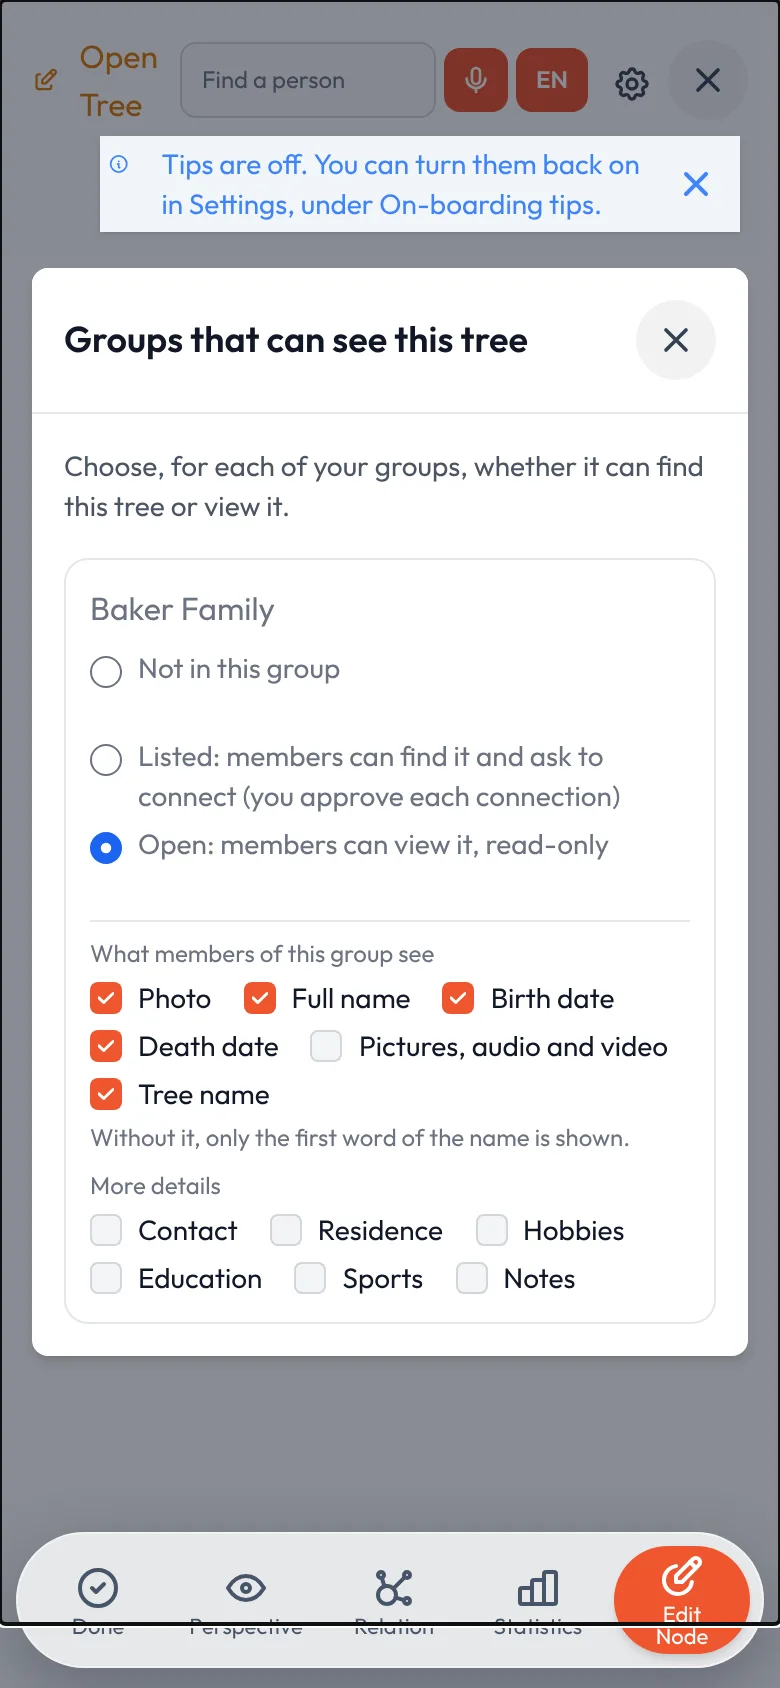
Members of a group can never change your tree. If you want someone to help you build it, give them Share to a Manager (lesson 9).
Trees opened to you
When a group you belong to opens a tree, it appears in the Shared tab of your trees list, marked View only with the group's name. Tap it to read the tree. You see only what its owner ticked; if the tree's name is not shared, it appears as "Tree of <owner>". On the trees page the group chips filter the cards by group.
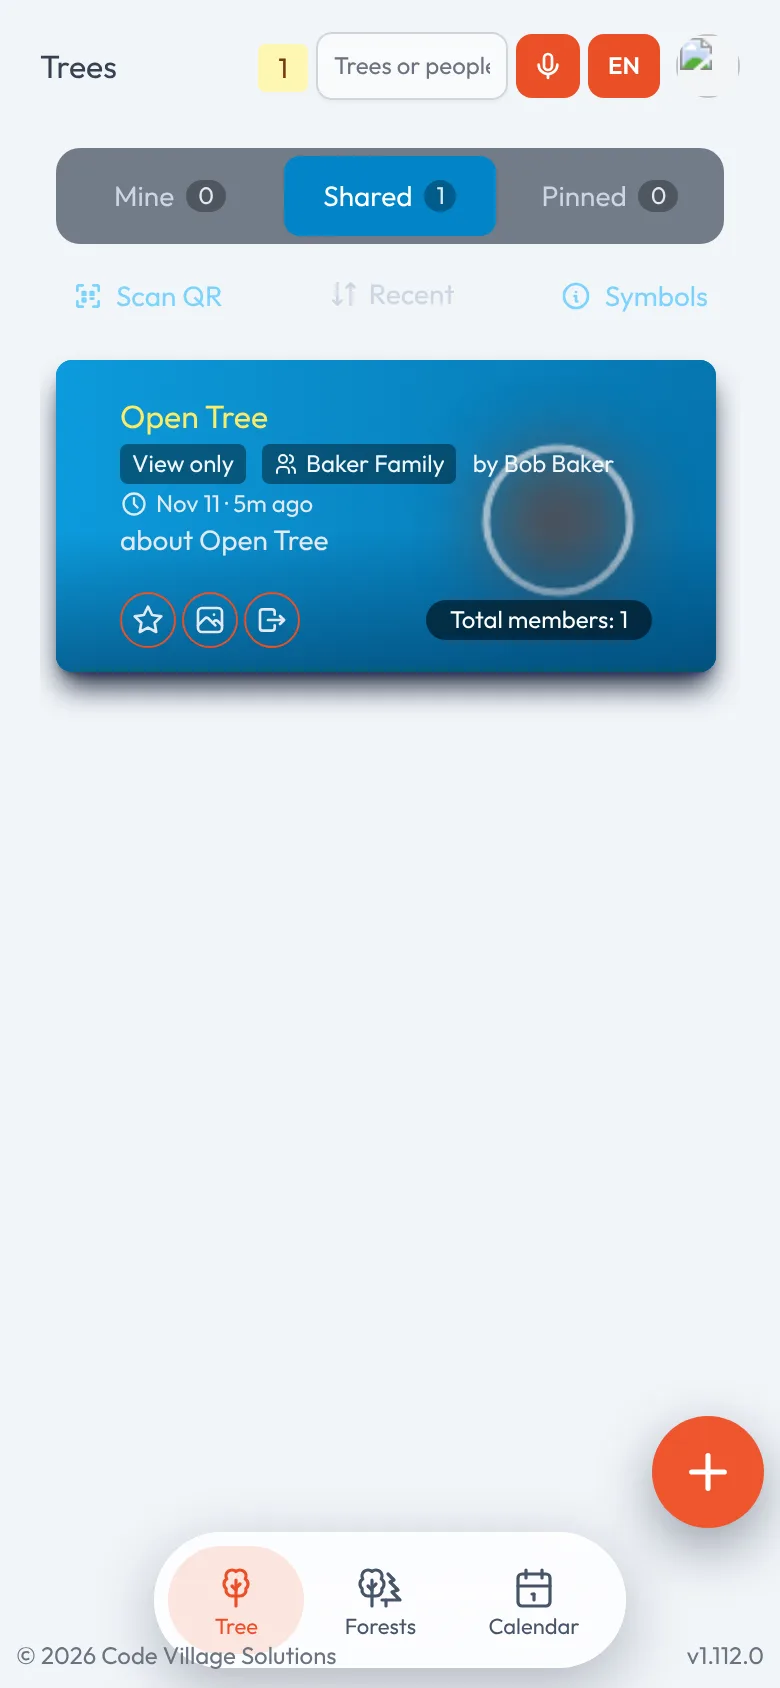
Trees you see through a group are left out of the all-trees search, the calendar, Memories and forests. Leave a group and you stop seeing what it shared at once. Your own trees are never affected.
The group name also appears under people found by name in the search results, so you know which circle you share with that tree.
Try it yourself
- Create a group with your family's name and make a new invitation link for a relative.
- Open one of your trees, choose the group and set it to Listed. Then set it to Open and look at what is ticked.
- Ask the relative to open the link, and check that the tree appears in their Shared tab. Then set the group back to Not in this group.
Remember
- Trees are found only through groups, and only people an administrator approves can join.
- Listed means "can be found"; Open means "can be viewed, read-only, with only the parts you tick".
- Invitation links are shown once and sent by you; the app does not email them.
- Leaving a group, or switching a tree back to Not in this group, takes the access away at once.